Development Process
General Procedure
1. Issues
Before making any changes to the project, like adding a feature or fixing a bug, it is required to open an issue in the projects GitLab. Every change beyond the scope of a new feature or bugfix requires a new Issue.
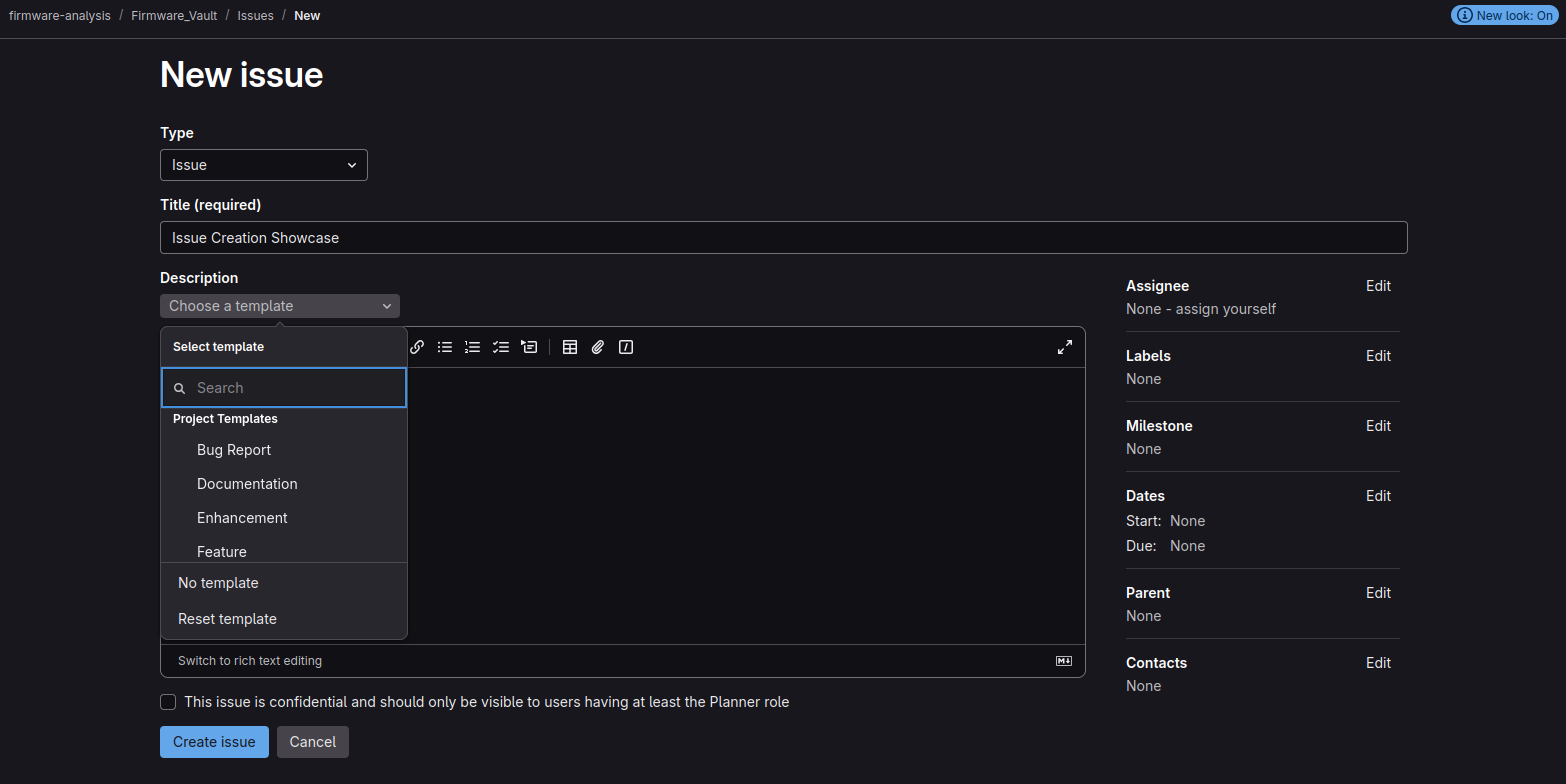
To create an issue a Template can be customized by following the steps below:
- Visit the projects GitLab Page
- Under the index tab Plan select Issues
- Press the button New issue in the top-right corner
- Select the appropriate Issue Template in the Description Dropdown Menu
- Fill out the form
- Press the button Create issue at the bottom
Issues need to have a title and ideally a thorough description of the problem that needs fixing, or an explanation of the new feature.
It might also be beneficial to include pictures. Various labels can be added to an issue to organize, categorize and prioritize its contents.
Additionally, a deadline can be set for urgent issues.
Issues can be broken down into smaller workloads called Tasks.
These might help with bigger issues, which require collaborative work or to divide an issue into more easily trackable items.
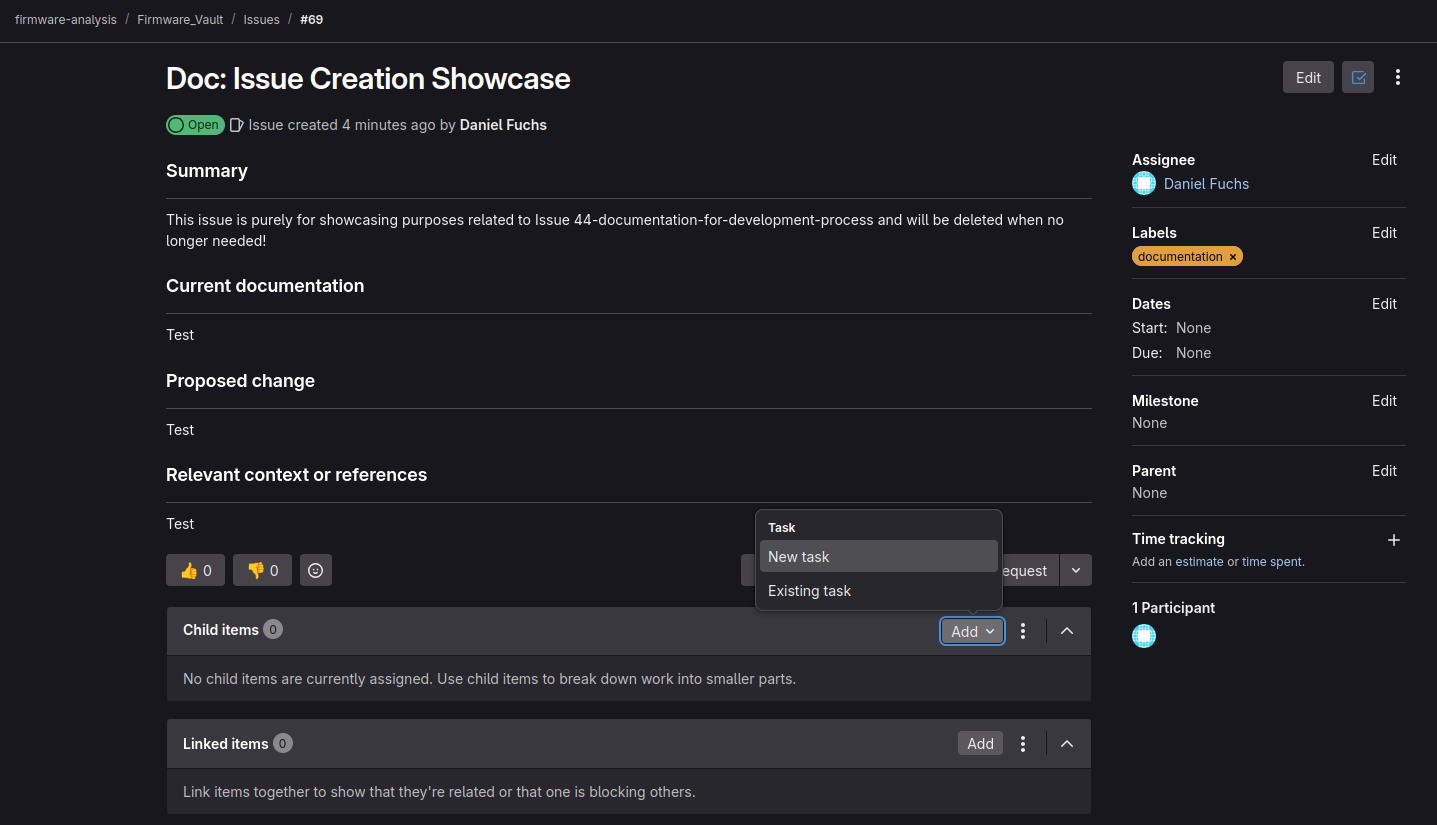
To divide an issue by creating a task the steps below can be followed:
- Press the Add button next to the Child items subsection in the lower part of the issue page to add a new or already existing Task
- Fill out the form
- Press the Create task button
- Open the Task page
- Press the Edit button in the top-right corner
- Give a description of the Task (Issue Templates as mentioned above can be used for this)
- Press the Save changes button
For more information on Issues and how to create them, visit the official Gitlab Issue documentation, as well as the official Gitlab Task documentation to learn more about Tasks.
2. Branch and Merge Requests
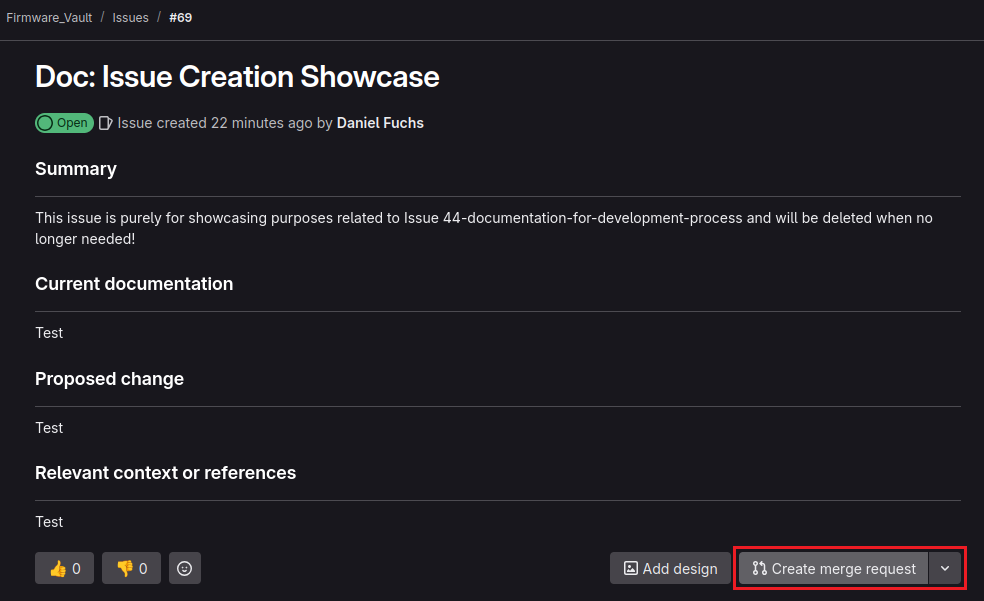
To resolve a given issue a branch and merge request is to be created.
For this, the steps to follow are:
- Press the Create merge request button below the issue description of the issue page
- Select the branch that will be branched off from
- Keep the automatically suggested branch name or choose another (keep the branch naming rules in mind)
- Press the Create merge request button
- Select the appropriate Merge Request Template in the Description Dropdown Menu
- Fill out the form (Can be done later, but must be finished before setting Ready for review Label)
- Marking the merge request as a draft via the Mark as draft checkbox blocks the branch from being merged prematurely until the draft status is removed, thereby helping to distinguish between merge requests in active development and merge requests waiting to be merged into the main branch
- Press the Create merge request button at the bottom
Once an issue and a branch + merge request have been created they can be assigned to the one developer that works on it. It is advised that teams assign tasks, issues and merge requests through regular meetings.
By branching as described above a feature branch is created. This is a separate branch used by the developer working on the issue that does not impact any other branches and their respective developers or the main branch.
With the git checkout tool developers can switch to the feature branch.
The Terminal command for this is:
git checkout <branch name>
The Terminal can be used to manually operate Git, but depending on the tools the developer is working with, Git might have integration into the used Development Environment.
Alternatively various Graphical User Interface programs are available to make this process easier.
Notable mentions are TortoiseGit for Windows and the built-in Git tools (which have to be downloaded separately) git-gui and gitk for Linux, available for package managers like apt.
When changes have already been made to one's own branch, but not yet committed, before checking out another branch the git stash tool has to be used, to not lose progress.
The Terminal command for this is:
git stash push --all
A list of stashed states can be seen by using the Terminal command:
git stash list
To inspect a stashed state, use the Terminal command:
git stash show <stash name>
To restore a stashed state, use the Terminal command:
git stash apply <stash name>
Changes within the remote main branch can be implemented in the feature branch in a two step process.
- First, the changes can to be downloaded with the
git fetchtool The Terminal command for this is:
git fetch
- Then with the
git rebasetool the commits of the feature branch will be moved on top of the changes that were made to the target branch. The Terminal command for this is:
git rebase <target branch to rebase to> <feature branch>
This should regularly be done, when new features are needed for development in one's own feature branch and before pushing changes. It might be necessary to resolve merge conflicts, then continue the rebase process.
Rebase should not be used, when commits were already pushed!
For more information on Branches, visit the official Gitlab Branches documentation.
For more information on Git Rebase, visit the official Gitlab Rebase documentation.
For more information on Merge Conflicts, visit the official Gitlab Merge Conflict documentation.
3. Commits
- When multiple developers are working on a single branch, especially before committing any changes, it is recommended to regularly run:
git pull
This applies remote changes to the local branch.
- Upon finishing changes to a file the developer can add the changes to the next commit with the
git addtool. The Terminal command to add a specific file is:
git add <file name>
To add all changes, use the following Terminal command:
git add -A
Previously added files can be removed from the index using the following Terminal command:
git restore --staged <file name>
To see changes made to a branch the git status tool can be used.
The Terminal command for this is:
git status
Files containing changes, that have not been added yet appear in red text, while files containing changes, that have already been added can be seen in green text.
- Upon adding all relevant files containing changes the developer can commit their labour to the feature branch with the
git committool. The Terminal command for this is:
git commit
Providing a commit message helps other and future developers understand what the commit aims to achieve. Explaining why and how changes are made makes future code reviews, debugging and troubleshooting easier. Multiple commits can be made to a feature branch before work on the Issue is completed.
- By using the
git pushtool the changes can be officially transferred to the remote feature branch.
The Terminal command for this is:
git push
For more information on Commits, visit the official Gitlab Commits documentation.
For advice on how to write commit messages, visit this guide on GitHub.
4. Linting
To ensure a consistent code style and quality, this project uses Ruff as a linter.
CI/CD Pipeline
The linter is automatically executed as a job in the CI/CD pipeline for every push. Currently, the pipeline will only show warnings if the code does not comply with the defined style guide. In the future, this will be changed to fail the pipeline to enforce the code style.
Local Usage
You can also run the linter locally. This is recommended before pushing any changes.
Installation
Install ruff via pip:
pip install ruff
Execution
To run the linter on the entire codebase, navigate to the root of the project and execute the following command:
ruff check .
Ruff will automatically use the configuration defined in the pyproject.toml file.
Alternatively you can specifically select the the config file with:
ruff check --config <path to config file>/pyproject.toml
5. Merge Request Reviews
If not already completed, the merge request description should be fully updated. To do this follow the steps below:
- Visit the projects GitLab Page
- Under the index tab Code select Merge requests
- Search for the merge request and open it
- Press the Edit button in the top-right corner
The developer can now propose their changes by marking their issue and merge request with the Ready for review Label.
Another developer can then read the code and mark it as accepted, rejected or start a discussion of the solution by leaving a comment. Reviewed merge requests should be labeled with the Reviewed Label.
For more information on Merge Request Reviews, visit the official Gitlab Merge Request Reviews documentation.
6. Merging
Once a merge request has been accepted by the reviewer and is marked as ready, the changes within the feature branch can be merged into the main branch by a maintainer. The maintainer role is held by the project owner / professor, but can also be given to developers by the project owner.
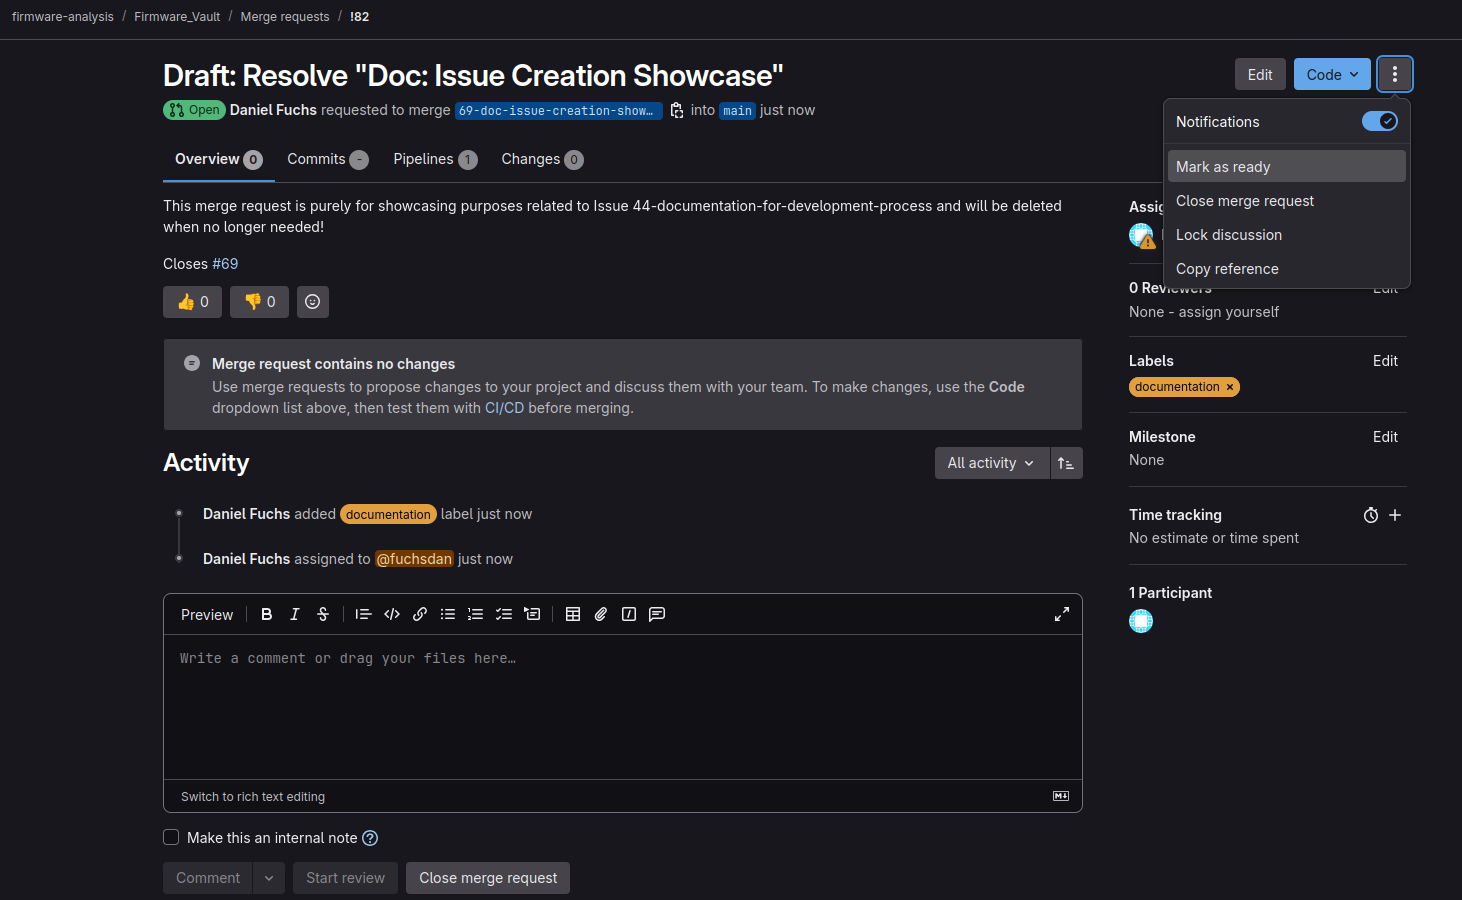
To mark a merge request as ready (removing the draft status) the steps below can be followed:
- Visit the projects GitLab Page
- Under the index tab Code select Merge requests
- Search for the merge request and open it
- Press the 3-dot button Merge request actions in the top-right corner
- Select Mark as ready in the Merge request actions Dropdown Menu
- Assign the merge request to a maintainer
Afterwards, the maintainer merges the feature branch into the main branch using the git merge tool, then closes the merge request and deletes the feature branch related to this issue.
The issue can now also be closed.
In cases where work on a merge request is permanently stopped the request should be closed instead of deleted.
For more information on Mergeing, visit the official Gitlab Merge Request documentation.
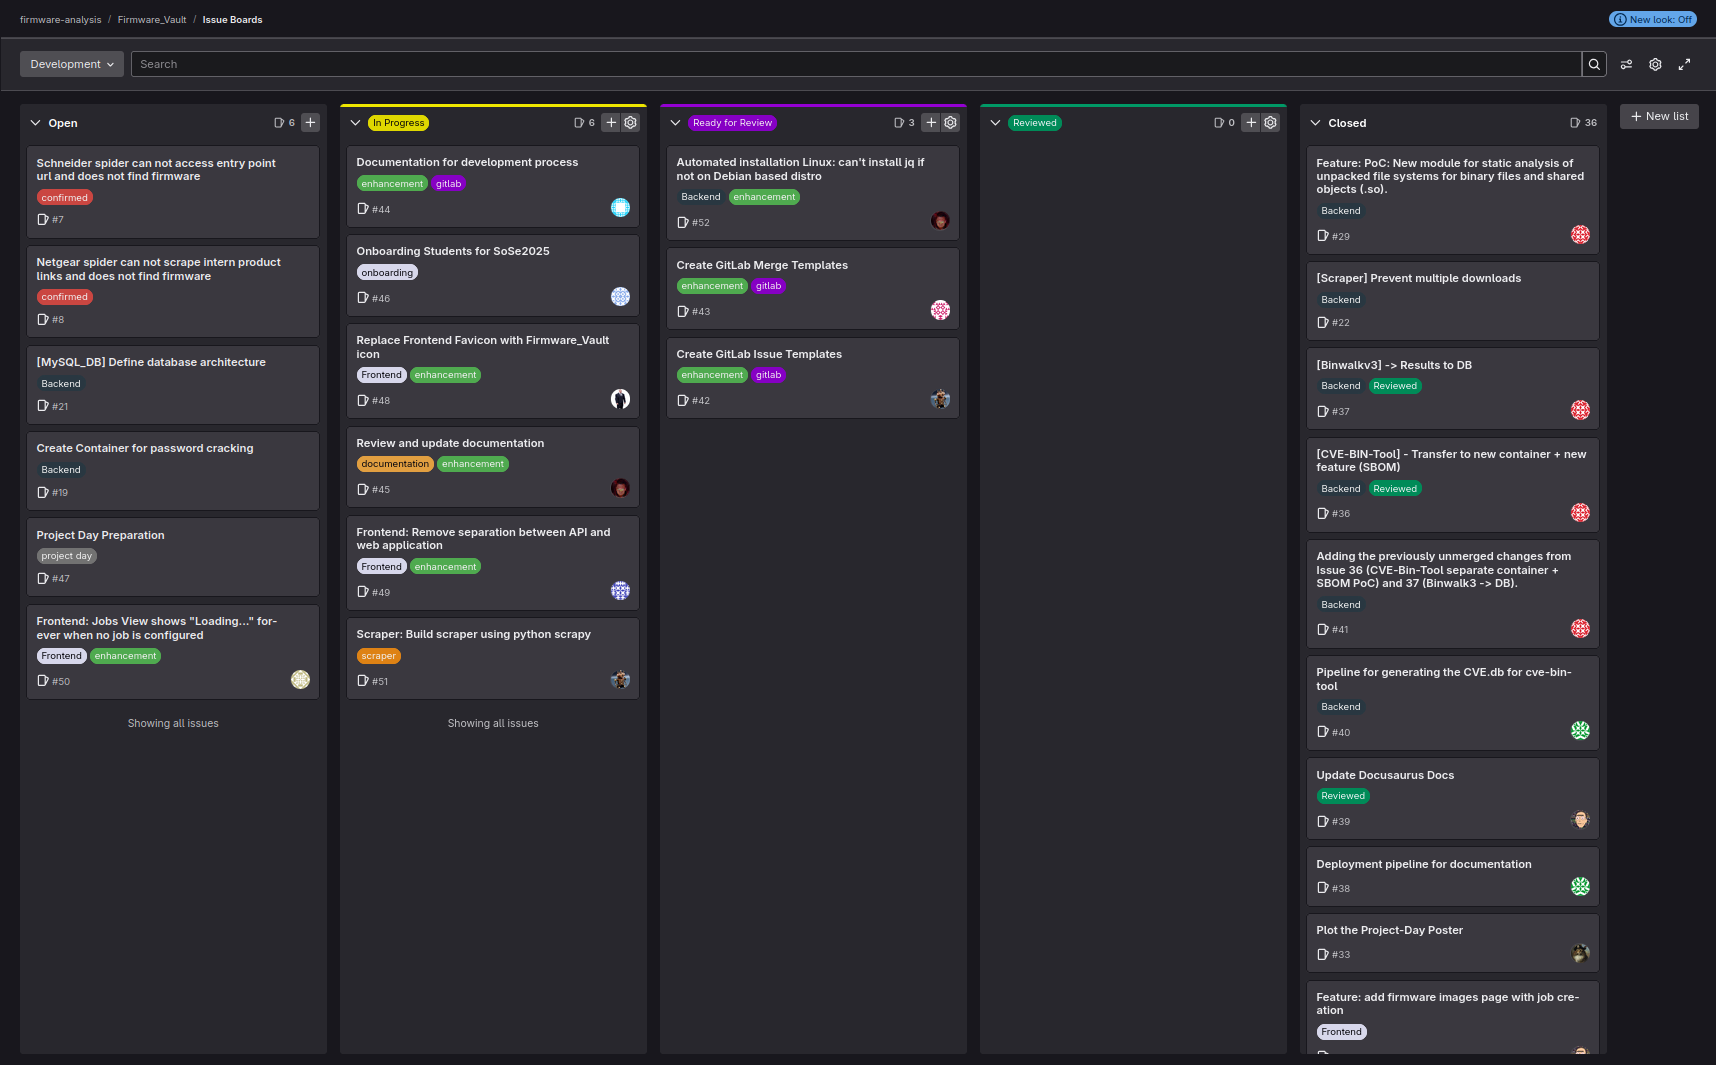
Kanban Board
A visual representation of the general procedure and the current state of development can be seen and managed at any time on the Issue boards Page under the Plan index tab of the projects GitLab.